
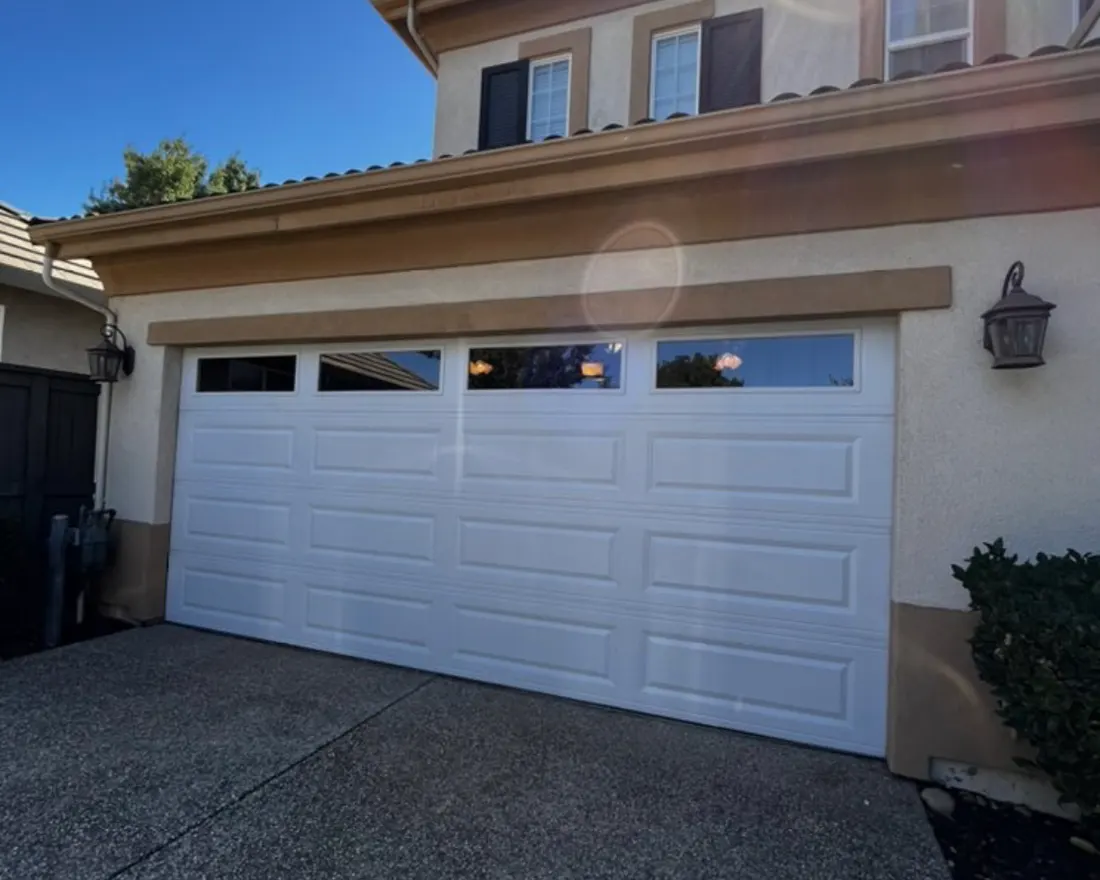
PRACTICAL ANSWERS, IN PLAIN ENGLISH
Start with what you can safely see.
Use these observations to identify a reasonable next step, not to diagnose a door from a distance. Keep the opening clear and follow the instructions for your exact door and opener.
A QUICK ORIENTATION
The door and the opener do different jobs.
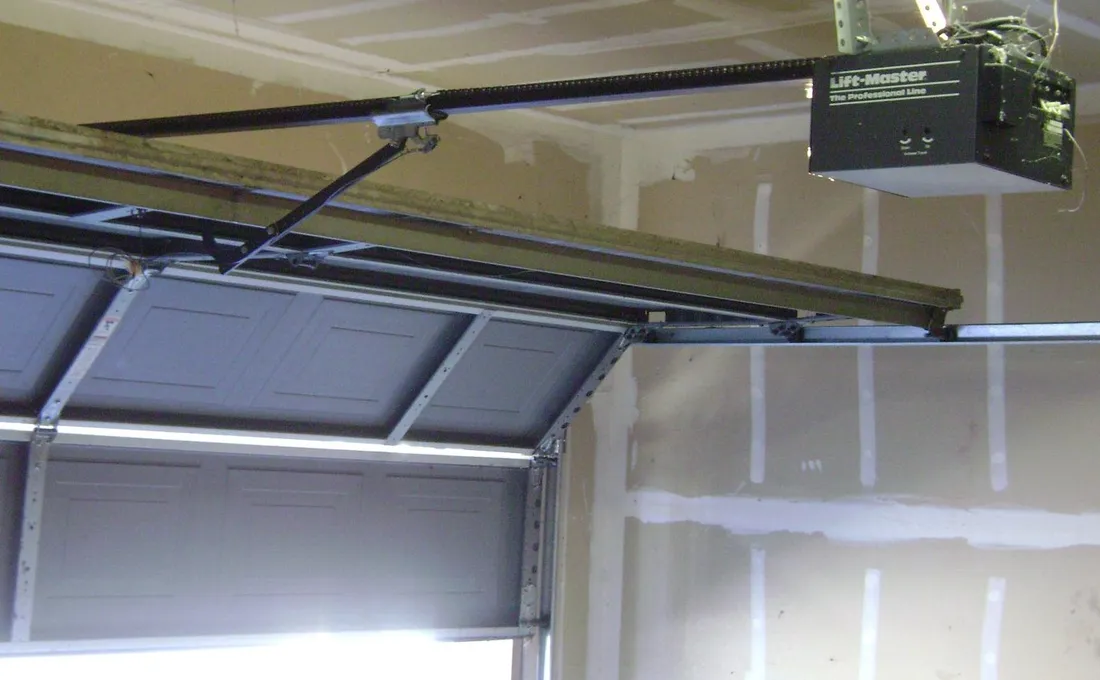

- The door & tracks
- The sections travel on rollers in the tracks. A bent track or roller outside it is a stop-use problem.
- The springs & cables
- They counterbalance and lift the door. The motor’s power does not make up for a failed spring.
- The opener & sensors
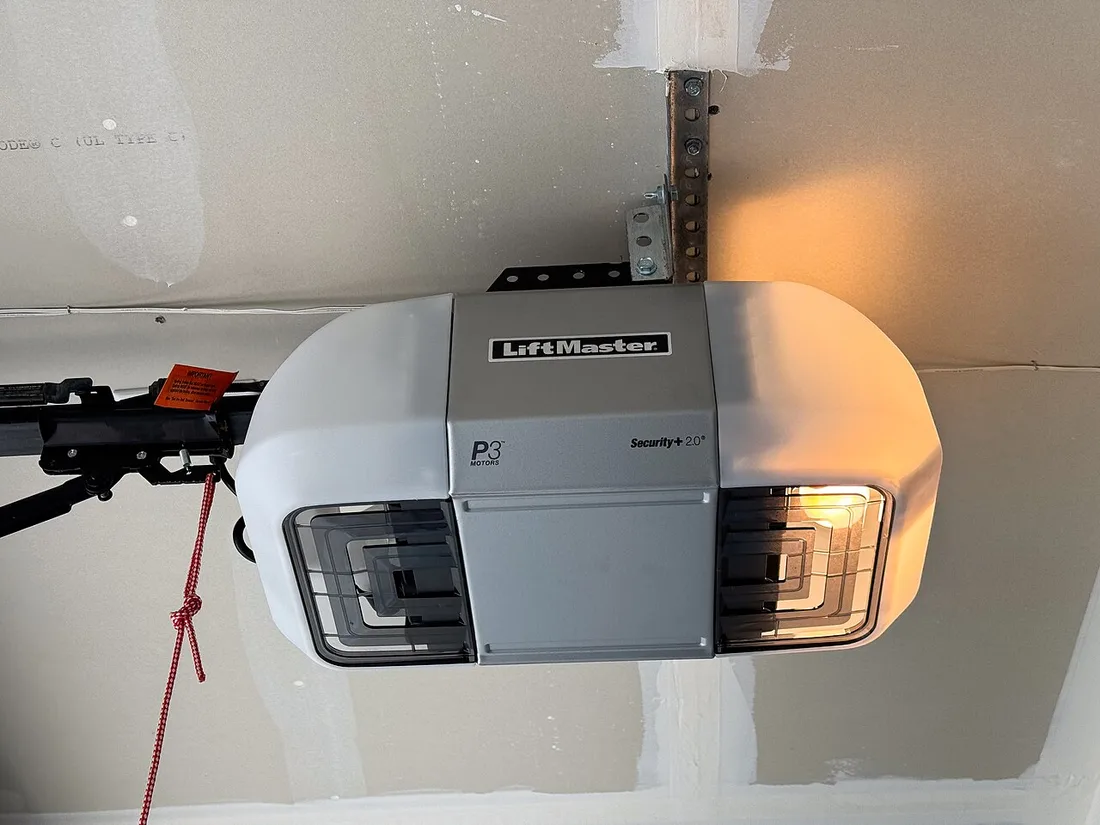
- The motor drives the door through its rail and arm. Photo eyes near the floor help protect the closing path.
This photo shows one chain-drive setup. Wall-mounted openers and other systems look different. Identify parts visually; do not disconnect or adjust them.
The garage door won’t open
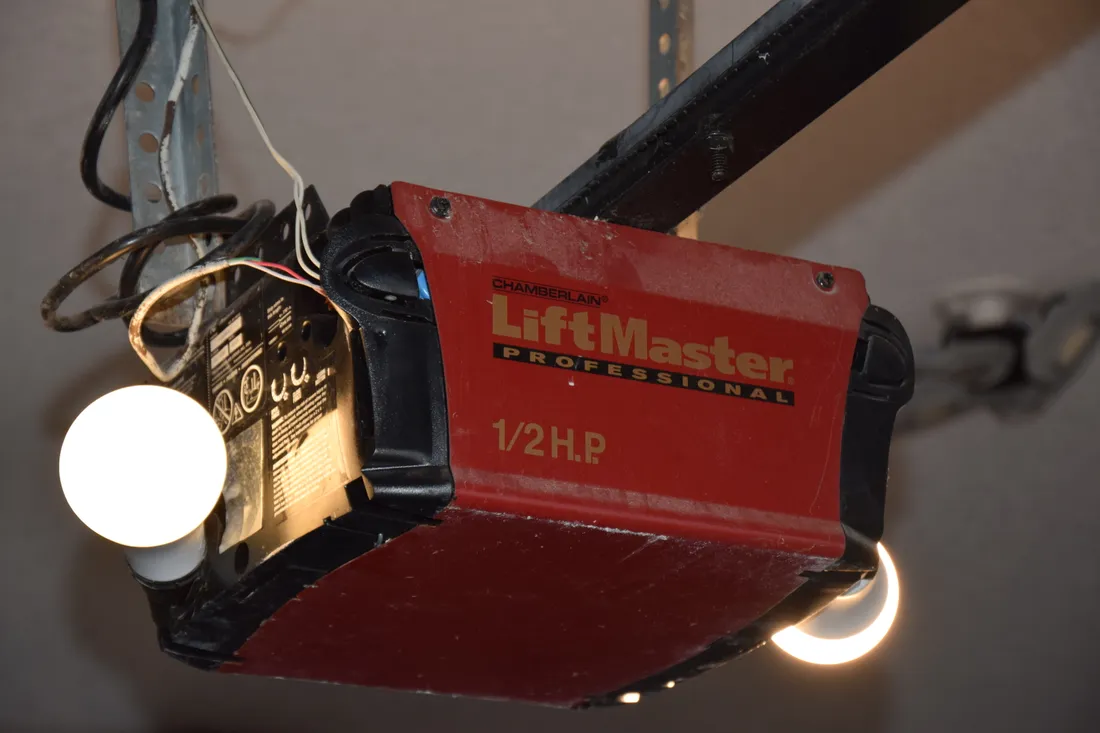
Start by distinguishing a dead control from a door the opener cannot lift. A silent wall button, a humming motor and a door that moves a few inches are three different clues.

What to check
- Look before trying another control. If the door is crooked, a cable hangs loose, a spring has a gap, or you heard a bang, stop here. Leave the door in place and keep people away.
- If the door looks intact, compare controls. Note whether the wall button, a second remote or the opener’s light responds. If the wall button works and just one remote does not, go to the remote checks.
- Check the power you can reach safely. A household outage, switched outlet or tripped breaker can interrupt power. If a reachable outlet also has no power, check the circuit; if it trips again or you notice a burning smell, stop and contact an electrician.
What your observations can mean
A working light does not prove the door is mechanically sound. A brief hum, straining sound or movement of only a few inches can accompany a spring or other door problem; the same symptom can have more than one cause. Don’t keep pressing the button to see if it clears.
The garage door won’t close
If a door starts to close and immediately reverses—or the opener lights flash—the safety-sensor path is one useful place to look. It is not the only possible cause.

What to check
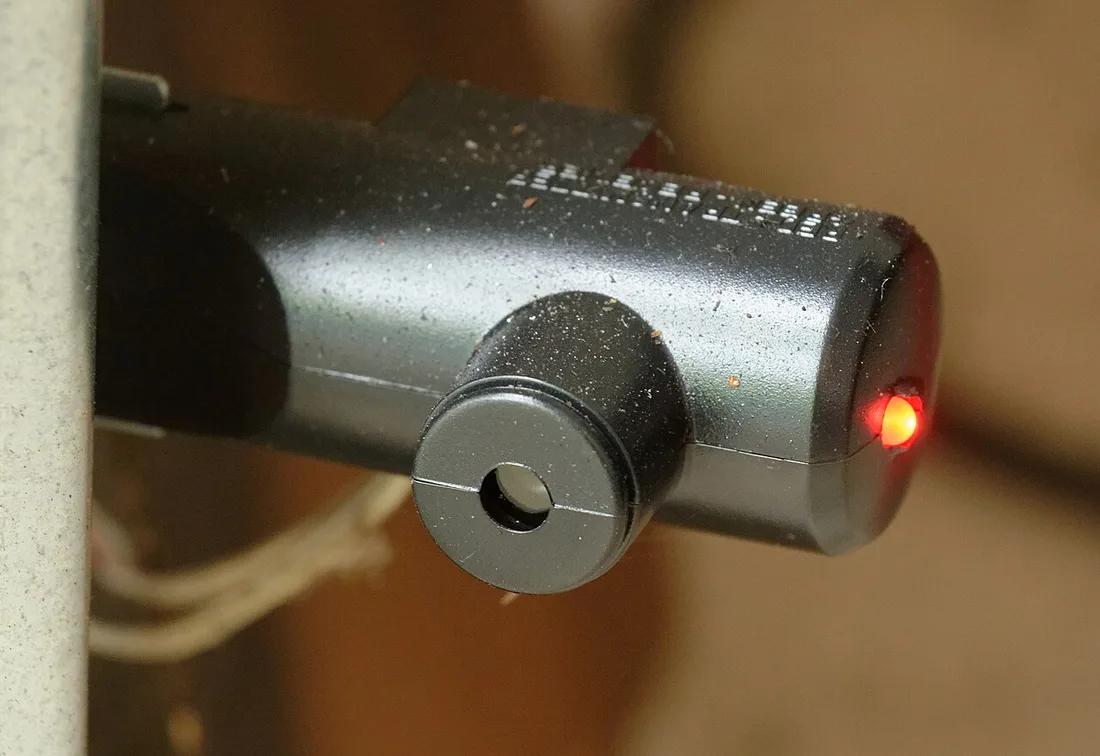
- Keep the opening clear. With the door stopped, look for a shovel, recycling bin, snow or anything else in the opening or between the small sensors near the bottom of the tracks. Move loose objects only from a safe position.
- Check the sensor faces. Gently clean dusty lenses with a soft, dry cloth. Look for an obvious bump or a dangling sensor, but do not touch wiring or loosen the door’s bottom brackets.
- Read the lights for your model. Some sensors use indicator lights for alignment and power; the colors and meanings vary. Your opener manual or Chamberlain’s model-specific sensor guide can help identify your equipment.
What your observations can mean
A blocked path can stop a closing cycle, while a loose sensor, damaged wire or another door problem may need a different repair. If your manual describes a safe alignment adjustment for your exact sensor, follow it; if you cannot distinguish the sensor fastener from the door hardware, leave it to a technician.
The door closes partway, then reverses
Where the door reverses is useful information. An immediate reversal can point toward the photo eyes; a reversal near the floor can also involve an obstruction, resistance or the opener’s settings.
What to check
- Notice the stopping point. Describe what happened during the cycle you already saw: did it reverse immediately, halfway down or just before reaching the floor? Record any flashing light pattern.
- Look at the opening while the door is stopped. Check for a ball, tool, ice buildup or loose debris in the travel path and along the threshold. Clear loose objects without going under an unsupported door.
- Inspect the sensor path from a safe place. If nothing is in the doorway, use the sensor checks above. A photo eye problem can make the opener behave as though something is in the way.
What your observations can mean
Reversing near the floor does not automatically mean the travel limit needs adjustment. A binding roller, bent track, obstruction or door resistance can look similar. Increasing force may hide the symptom while leaving the original problem unresolved.
The remote or keypad stopped working
If the wall control operates an otherwise intact door but one remote does not, the issue may be the remote, its battery or its programming. If every control is unresponsive, start with power instead.
What to check
- Compare an already-working control. If another remote works, the problem may be isolated to the first one. If the wall control works but all remotes fail, check whether its lock or vacation feature is enabled; the location and behavior vary by model.
- Replace a removable battery. Open the remote according to its instructions, match the printed battery type and polarity, and securely close the case. Some remotes do not have a replaceable battery. Keep button batteries away from children.
- For a keypad, check its own battery and PIN. A keypad can fail independently of the wall control. Follow its model’s instructions for the battery, PIN and lock settings instead of assuming a single code or reset method fits every opener.
What your observations can mean
If a remote works only very close to the garage, a weak battery or radio interference can be involved. A brand-new remote that never worked may be incompatible or need programming. These are clues, not proof that the opener motor needs replacement.
The opener runs but the door does not move
The opener motor, its drive rail and the door’s spring system have different jobs. A running motor does not tell you whether the door is safe to lift or which part has failed.

What to check
- Stop the opener and look from the ground. A crooked door, slack cable, separated spring or damaged rail is a reason to stop, even if the motor still makes noise.
- Remember what happened before the problem. If someone intentionally disconnected the opener during a power outage, tell the technician or refer to the exact model manual. An intact, fully closed door may have a different reconnection procedure from a damaged or partly open one.
- Describe the sound and movement you already saw. A brief hum with no movement, a moving trolley without a moving door, and grinding from the motor are different observations. Do not run repeated cycles to diagnose them.
What your observations can mean
Depending on the system, a disconnected trolley, drive component, door lock or broken spring could be involved. Chamberlain’s troubleshooting information distinguishes several of these patterns by opener type.
The garage door squeaks, shakes or grinds
A light recurring squeak can call for routine maintenance. A new grinding noise, heavy shaking or a loud bang followed by a stopped door deserves a closer look.
What to check
- Describe the sound. Note whether you heard a squeak, scrape, grinding or bang, and whether it seemed to come from the opener, one side of the door or the floor. You do not need to run it again to locate the sound.
- Look for a visible change from the ground. A crooked section, loose cable, damaged track or unusual door movement is more important than the sound alone. Stop using the door if you see any of these.
- Use the maintenance instructions for the actual door. If the door is operating normally, its manual may identify lubrication points and an approved lubricant. Do not spray sensors, guess at lubricant placement or loosen hardware to reach a part.
What your observations can mean
Rollers, hinges and tracks can all produce noise, but similar sounds can come from different causes. Lubricant will not straighten a bent track, replace a worn component or repair a broken spring.
The garage door is crooked or off track
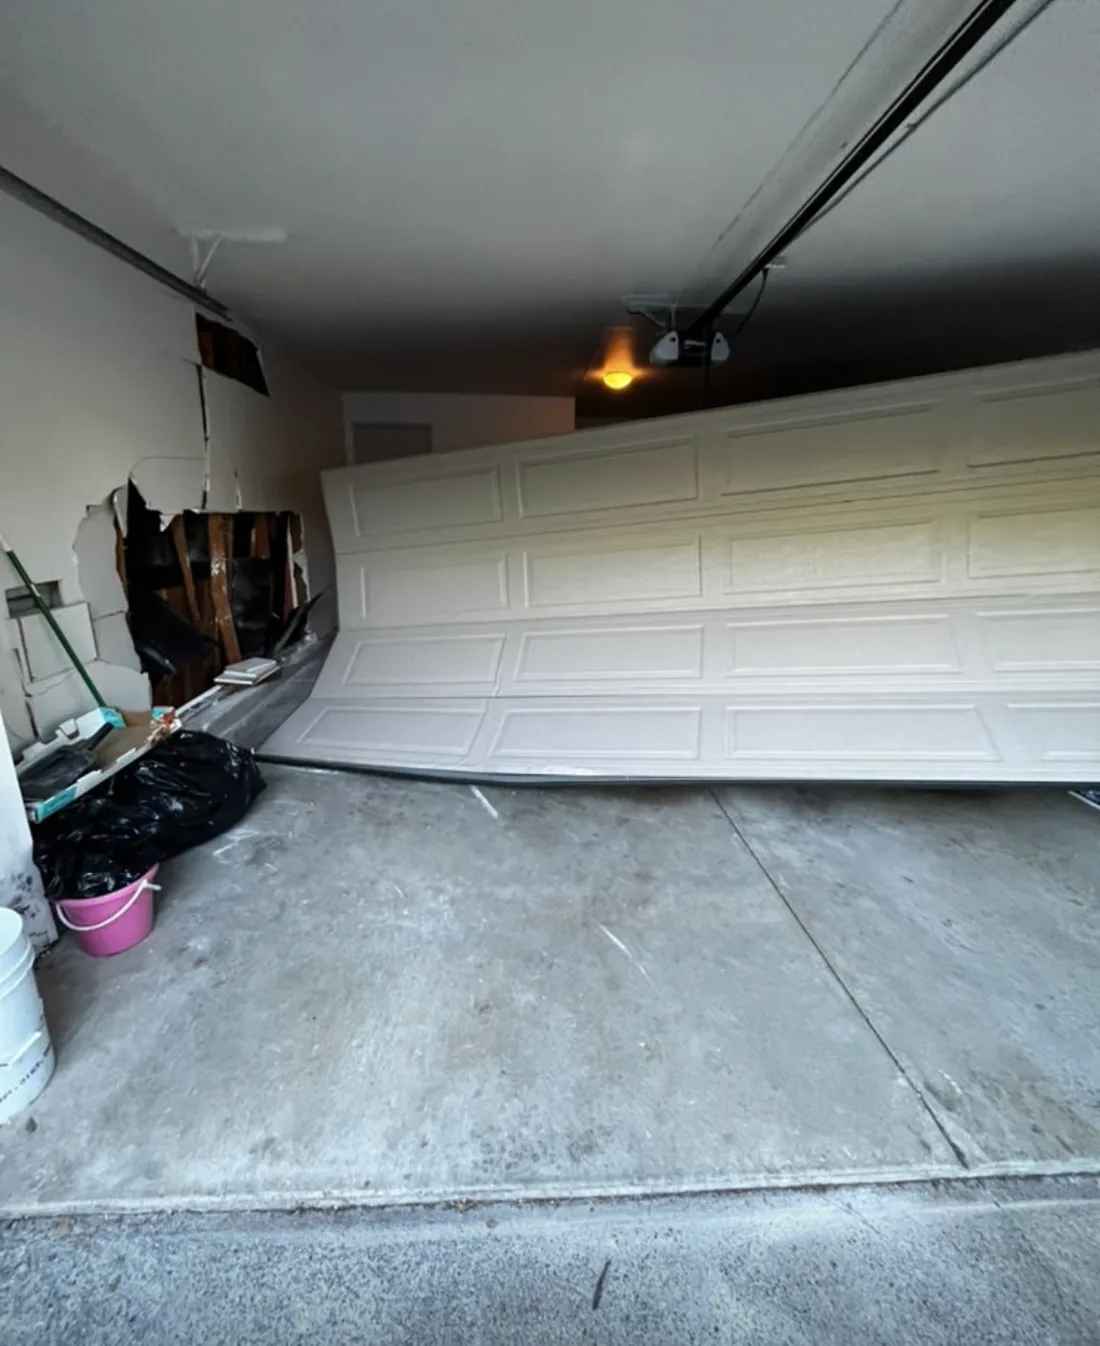
A door hanging unevenly, a roller outside its track or a loose lift cable can mean the door is unstable. Treat this as a stop-use problem even if the opener still runs.
What to check
- Leave the door where it stopped. Keep people and pets away from the opening and do not walk or drive beneath a raised or partly raised door.
- Record what you can see from a safe distance. Is one side higher? Is a roller out of the track, a panel bent, or a cable hanging? A safe photo can help explain the symptom, but do not approach the door or move it to get one.
- Tell us about access. Let CLE know whether the door is open, closed or partly open, and whether a vehicle is trapped. We can confirm coverage and available appointments when you contact us.
What your observations can mean
A roller can leave a track because of an impact, cable trouble, damaged hardware or another issue. Pushing it back in without addressing the cause can leave the door unstable; the visible part is not necessarily the only damaged part.
A loud bang, spring gap or loose cable
Springs help counterbalance the weight of the door. When one breaks, the door can become too heavy for the opener or for a person to lift safely.
What to check
- Stop using the door. A loud bang, a door that only lifts slightly, or a loose cable can accompany a spring failure. Other faults can look similar, so don’t test the weight by hand.
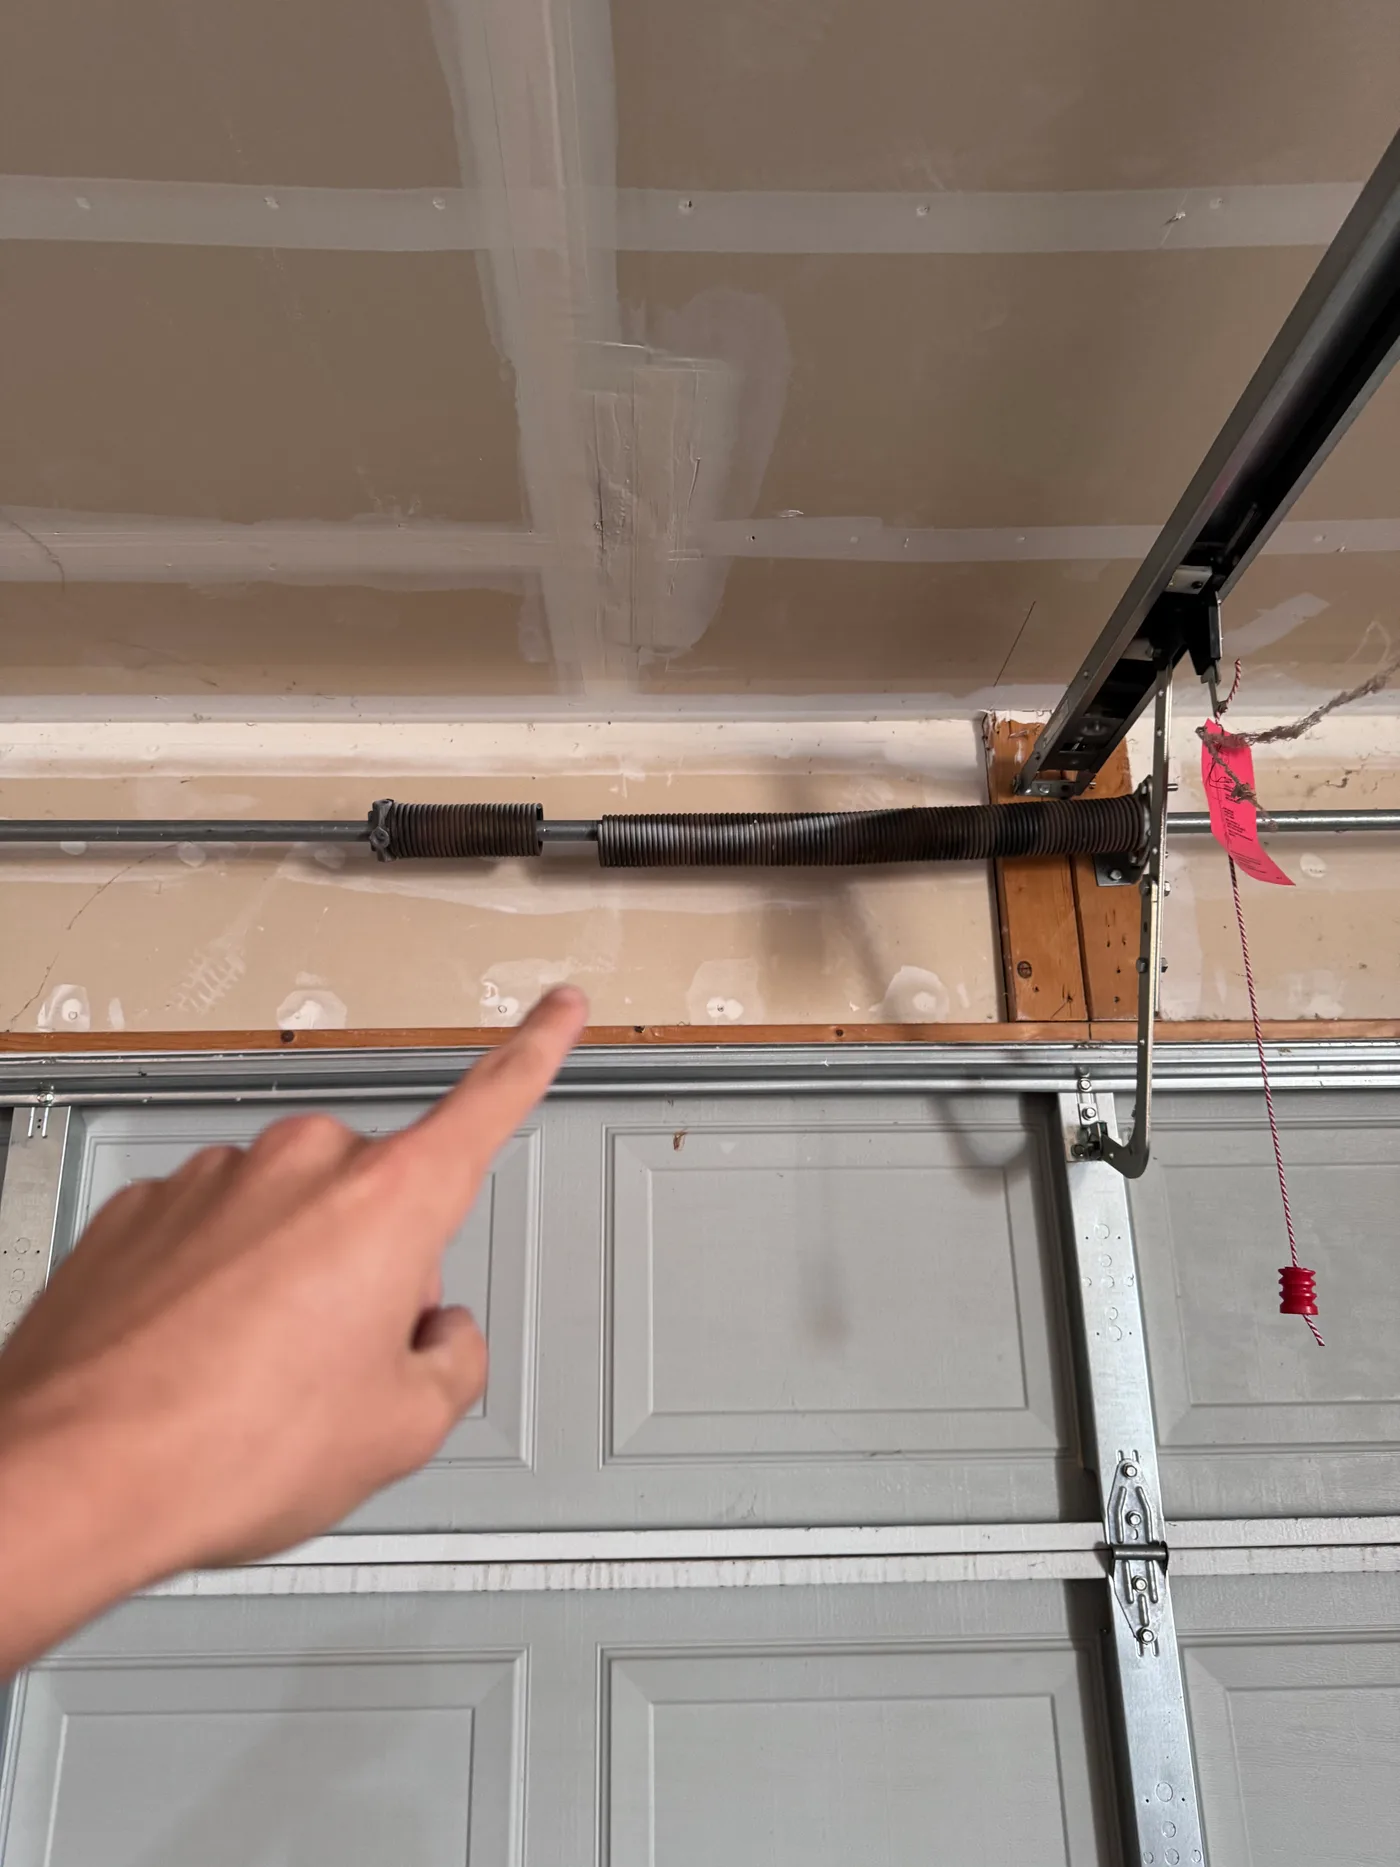
- Look only if it is safely visible from the ground. A torsion spring is commonly mounted on a shaft above the door. A separation in the coils of one spring is a visible warning sign; do not climb up or touch it.
- Don’t confuse every space with a broken coil. Some doors have two separate springs with hardware between them. The concern shown in the photo is a gap within a spring. Spring layouts vary, and you do not need to identify yours before calling.
What your observations can mean
A slack cable or crooked door can be related to a spring failure, but it can also have another cause. Springs, cables and bottom brackets can be under high tension, even when a door is closed.
The garage door is stuck in freezing weather
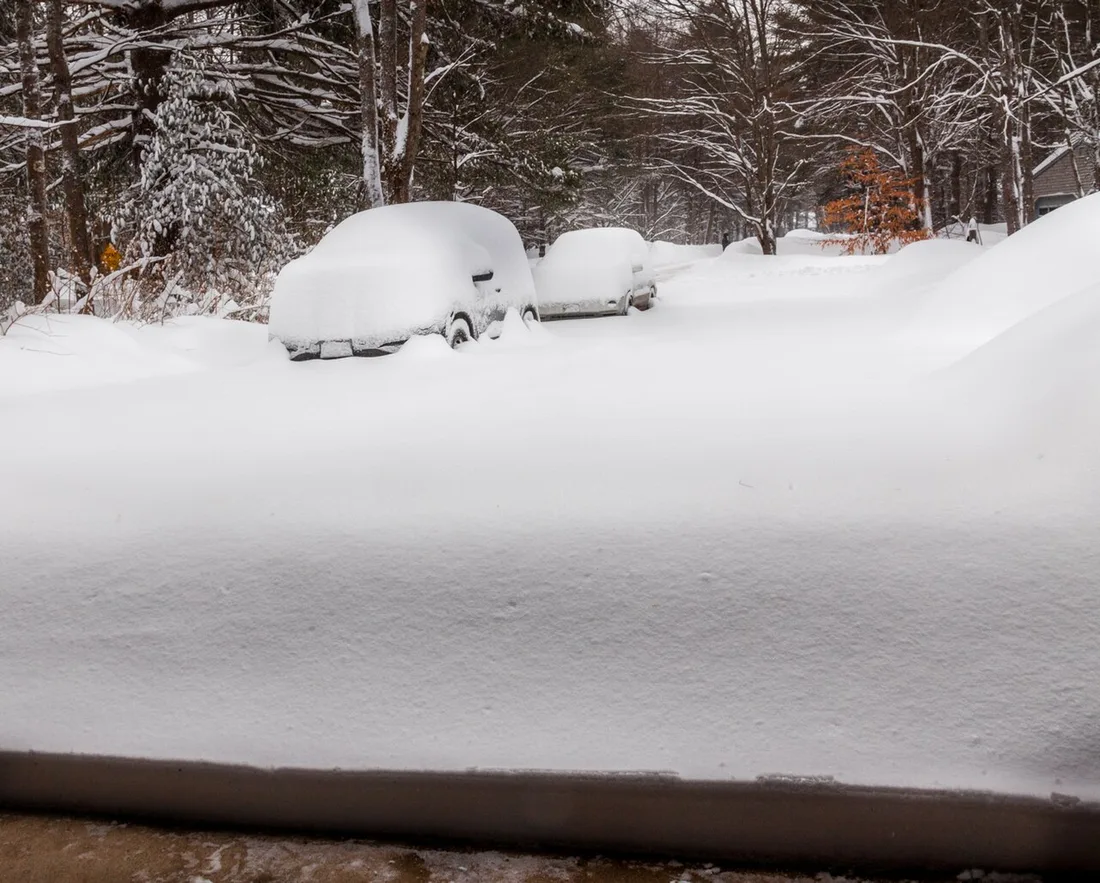
After a Cleveland-area freeze or snowfall, ice can collect where the bottom seal meets the ground and snow can block the opening or sensor path. A stuck door can also have a mechanical problem.

What to check
- Stop pressing the remote if the door will not move. Forcing the opener against a stuck or damaged door can make the situation worse. Leave a crooked door or loose cable alone regardless of the weather.
- Look around the threshold and sensor path. From a safe position outside the door’s path, clear loose snow and remove stored objects that block the opening. Do not chip at the bottom seal or try to pry the door free.
- If the seal appears frozen to the ground, allow it to thaw safely. Follow the door and seal manufacturer’s advice for your setup. Do not use an open flame or pour boiling water on the door or seal.
What your observations can mean
If the door still does not work after an obvious snow obstruction has been cleared and the area has thawed, ice may not have been the only issue. Watch for damage or an uneven position without repeatedly cycling the door.
There is a gap, draft or water at the bottom
A strip of daylight under a closed door may point to a worn bottom seal, an uneven floor, a damaged section or how the door closes. Water at the threshold can also involve drainage.
What to check
- Look with the door fully closed and stopped. Notice whether the gap runs all the way across or is concentrated at one side. Keep hands out of hinges, tracks and section joints.
- Inspect the visible seal. Look for missing pieces, cracks, hardening or debris that prevents the seal from meeting the floor. A photo of the gap and the seal profile can help a technician identify the right replacement.
- Check the outside conditions. Notice where rainwater or melting snow collects. A new bottom seal may improve contact with the floor, but it does not fix every slope, pooling or drainage issue.
What your observations can mean
A seal that is torn or missing may be replaceable without replacing the entire door. If a panel is bent or the door is crooked, the seal may not be the root cause. Compatible seal types vary by door.
LOOK AT THE WHOLE DOOR
Repair it—or replace it?
A failed remote or worn seal is different from damage across several sections. Ask for an explanation of the fault before comparing a repair quote with a new door.
Ask about repair when…
- The fault is confined to an identified part, such as a sensor, spring or compatible seal.
- The door sections and remaining hardware are sound after inspection.
- A compatible replacement part is available and the quoted work restores safe operation.
Compare replacement when…
- Several sections are damaged or the structure has deteriorated.
- Matching parts are unavailable, or the proposed repair leaves other substantial work.
- You also want to change insulation, appearance or the door’s suitability for your garage.
Replacing the opener alone does not repair a broken spring, cable or damaged door. Compare written scopes, installed totals and warranties. Age by itself is not a complete diagnosis.
Compare new-door optionsCLEVELAND CONDITIONS TO MENTION
What happened before it stopped?
Seasonal clues help explain the timing, even when they do not establish the cause.
After snow or an overnight freeze
Look for snow in the sensor path and a bottom seal frozen to the threshold. A door that stays stuck after thawing may have a separate fault. Start with winter checks →
After rain or snowmelt
Notice where water collects outside the garage. A replacement seal cannot correct every uneven floor or drainage problem. Check gaps and seals →
Only at a certain time of day
Tell us whether direct sun reaches a photo eye when closing fails. Chamberlain notes sunlight interference as one possible cause on its systems; wiring and alignment can also be involved.
MAKE THE FIRST CONVERSATION MORE USEFUL
Before you request a repair
A few observations help us understand the situation. You don’t need to know the failed part or climb up to find a model number.
- Describe the position and access. Is the door open, closed or partly open? Is a vehicle trapped? Share your ZIP code so we can confirm coverage.
- Tell us what changed. Mention an impact, power outage, freeze, new noise or remote battery change. Say which controls responded during the attempt you already made.
- Take a photo only if it is safe. A wide view can show the door’s position; an existing model photo can identify the opener. Stay clear of the opening and tensioned parts.
- Ask what the quote covers. Confirm the failed part, installed price, tax, any additional work, warranty terms and the safety checks after repair.
Copying stays on your device. It does not submit a service request.
GARAGE DOOR TROUBLESHOOTING FAQ
Questions about fixing a garage door
How do I fix a garage door that won’t open?
First look for a crooked door, loose cable or a gap in a spring. If you see damage or heard a loud bang, stop using the door. If no damage is apparent, compare the wall control with the remote and check safely accessible power. A working wall control can point toward a remote issue; a humming motor or a door that barely lifts needs a different check. Follow the won’t-open checks.
Why won’t my garage door close all the way?
An object in the opening, dirty or misaligned safety sensors, door resistance or opener settings can prevent full closing. With the door stopped, clear loose obstructions and gently clean the sensor lenses. Read indicator lights using your exact model’s manual. If the problem continues, have the door and safety system inspected rather than increasing closing force or bypassing a sensor. See what to check when the door won’t close.
Why does my garage door go back up after closing?
A door that reverses can be reacting to an obstruction, a sensor problem, resistance or travel settings. Notice whether it reverses immediately, partway down or when it reaches the floor. That timing helps narrow the next inspection, but does not prove a particular part has failed. Do not repeatedly cycle the door or increase force to overcome the problem. Read the reversing-door checks.
Why is my garage door remote not working?
If the wall control works but one remote does not, check the remote’s removable battery and the instructions for its model. If every remote fails while the wall control still works, check the opener’s lock or vacation setting. A replacement remote must also be compatible and programmed correctly. Avoid holding the learn button without checking the manual; on some models it erases paired controls. Troubleshoot the remote or keypad.
Why does my garage door only open a few inches?
A broken spring, binding door or another mechanical fault can stop the opener after a small movement. A loud bang, visible spring gap or loose cable makes a spring or connected-hardware problem especially concerning. Stop trying to open it and keep people clear. Do not pull the release or test the door’s weight by hand when damage is suspected. See the spring and cable warning signs.
Can I fix my garage door myself?
Some simple problems can be resolved by replacing a remote battery, clearing loose objects from the opening or cleaning sensor lenses according to the manufacturer’s instructions. Springs, lift cables, bottom brackets, an off-track door and damaged structural hardware need a trained technician. Start with the symptom and stop if the door looks unstable, feels unsafe or requires an adjustment you cannot identify. Find the checks for your symptom.
How much does it cost to fix a garage door in Cleveland?
The cost depends on the actual fault, the door and the parts and labor required. A remote problem, a failed spring and a damaged door do not have the same repair scope. Ask for a diagnosis and an installed quote that explains tax, any additional work and warranty terms before approving the repair. CLE can inspect the problem and explain the options. Explore Cleveland garage door repair service.
LOCAL HELP WHEN YOU NEED IT
Tell us what the door is doing.
Based in Avon, CLE serves Cleveland’s west side and nearby communities, including Avon Lake, Westlake, Bay Village, Rocky River and Lakewood. Tell us your ZIP code, whether the door is open or closed, and what changed. We’ll confirm coverage and available appointments.
View all service areas →Sources & helpful reading
Our guide draws on DASMA’s garage door safety guidance, Chamberlain Group’s sensor guidance, Chamberlain’s remote troubleshooting and Clopay’s guide to garage door seals. Photos from other photographers are credited with their licenses above. Always follow the instructions for your exact model.
Published October 29, 2026 · Updated October 30, 2026 by CLE Garage Door Repair & Installation.